Thursday, December 6, 2012

Lawn Fawn's CHA Winter Challenge


Lawn Fawn CHA Winter 2013 Challenge!


Hi everyone. If you have been on my Facebook page you will know that I love Lawn Fawn stamps. They have two new sets out this week...you so need to go check them out. You can see them here on the Lawn Fawn Blog!

Lawn Fawn is having a Challenge for CHA Winter and their Catalog.  I know, right?  So I made a Tri-Fold Card for this challenge. (Thank You Sandy, from Operation Write Home, for the tutorial and measurements!)  

This is the front of the card! I popped out the sun and the kites!

Now check out the inside!
The stamps are from the Sunny Skies set from Lawn Fawn. There are more stamps to this set.  I use every single one of them all the time! 

Have a great night everyone! 

Laurie

Monday, December 3, 2012

12 Days of Christmas Blog Hop

         Hi everyone, and welcome to the 10th day of the 12 days of Christmas blog hop.  You should have gotten here from Lisa's blog!
         So what I wanted to show you today is  a card I made in the shape of a door complete with measurements.  First thing I did was find a wreath digital stamp from my extensive digi file, that I liked, printed it out and colored it in with my Copic Markers. If you are the designer of this wreath please let me know so I can give you credit.

        After I had it all colored in, I added glossy accents to the berries and cut it out. I then colored another one of the ribbons and cut that out. I used pop dots to elevate the second ribbon to give it some dimension. Now for someone who used to design architectural interiors (pre-Mommyhood) the next part was really fun for me.  On a piece of graph paper I drew out a door and used the wreath to guide me in the sizing.


     Once I had the door drawn out I added the measurements. As you can see below I was pretty detailed with the measurements. Its the drafting training coming out. You won't need to be this detailed in your drawings. I find it helps when I do clean and simple projects though to have all the measurements pre-drawn.

 Once I had all the door panels cut out I inked the edges in a super dark brown ink so they would stand out as individual pieces.
 I put the door panels together and then used a brad as a door knob. I then added the wreath using more pop dots. I cut the dots in half so they would be half as tall as usual. I didn't want to give it too much height.  I then added the card front to the card base and it was done!


This is how it looks completed.


Please let me know what you think....leave a comment.
And don't forget your next stop on the blog hop is at Heather's blog.


Cheers,
Laurie

Friday, November 16, 2012

To Color Or Not to Color...

       Hi everyone.  I am sure at this point you have your Thanksgiving menu planned, your shopping list written and your "Black Friday" plans made.  Here at my house its total panic. I finally looked at the calendar and realized that Hanukkah is very early this year. Just three days after my 11 year old turns 12.  OMGosh I have just three weeks until Hanukkah.  I better get going. I need to find a short cut.  I need to get those presents wrapped and I need to get my gift tags made.  How am I going to do that???

     Lets talk about the digital stamps from Scrapper's Delights. Did you know that when you buy a stamp set from Scrapper's Delights you get not only an uncolored version but a colored version. I found my short cut!  I chose to use this little beauty on my Hanukkah gift tags.  Check her out here!  Since I have two little girls I knew that the chances of the tags surviving the gift opening frenzy where slim to none, I didn't want to spend hours making each tag.  I did want my gifts to be beautiful, complete with gorgeous tags.

    Well this is where I took advantage of the fact that at Scrapper's Delights gives you a choice to color or not to color!  I didn't color but I did embellish. Lets take a look at what I did on my tags.
Now this is what I did. After I added the sentiment underneath the digital stamp I printed her out and trimmed the tag down to size. Then I punched a hole where the button on her hat is and inserted a brad. I then put glitter pen on the brad and waited for it to dry. Once that was dry I cut out the slits for the ribbon that would be woven through the tag. When that was done I used my decorative corner rounder and jazzed up the corners a tad bit. Then I went over the white parts on the image with white puffed paint. This gave her some texture. I used glaze pen on her hair to brighten up that pretty red and on her eyes.  I then sponged a tiny bit of shimmer onto the rest of her dress. One the ribbon was woven through and tied I was able to attach her to the present.

What do you think of the outcome?  Let me know in the comments section.
You all have a fantastic Thanksgiving!!
Cheers,
Laurie

Wednesday, October 31, 2012

Happy Halloween


Hi everyone, as we crafters are apt to do...the day of one holiday we start planning our projects for the next! Sometimes during that process we make some design or technique choices that just don't work out!  Let's take that journey and see where I what I end up with. After that I have a funny story to tell you all. I am sure most of you can relate!
So let's take a look. I used the Autumn Nymph Image from Scrapper's Delights.

Step 1:  The first thing I did was print out the image twice.
This allows for any mistakes I may make in coloring. Most times while I am coloring in the minutest detail....that is when the dog decides to jump on my lap. So you can see I printed our little beauty out twice. I used Copic paper in my printer because that seems to work the best when using Copic Markers.


                                                              Step 2:


Well I decided that I wanted to do some inking and thought this shape would be perfect. But once I got the mask cut out I didn't think it worked so well. So on to the next! I chose a softer scalloped edge.


 Step 3: The Inking.

The photo on the left is my first attempt. What if I lightly went over the whole image. I was amazed at how little I liked the way it turned out. So then...Oooh I could use the cut out of the mask and use it to cover up the image and ink around it!

Step 4:

As you can see I liked it. so I matted the image and colored it in with my beloved Copic Markers. Then the next adventure was.. I had this beautiful image, colored, matted and glitter penned. What do I do with her now? Should I make a card? A Scrapbook Page? A Tag perhaps?  Then it hit me...Thanksgiving is coming up and with Thanksgiving comes food...lots and lots of food. And what do you do when you have a lot of people and a lot of food?  You create a Buffet!

                              Step 5:
After matting the image on a piece of golden card stock. I printed out the Pumpkin Pie sign and then inked the edges of that. Added a pretty brown bow and a Pumpkin Pie.

Ok so here is the Pumpkin Pie Adventure Story:
I ordered a beautiful pumpkin pie from our local grocer. The pie was beautifully decorated. I was so happy because I could get the pictures done ahead of schedule and in some outstanding lighting. Well I happily took this beautiful pie to the register to pay for it. At this point I handed the pie to the clerk and since the price tag was not on the top of the box the clerk flipped it over. Yes he took my perfect pumpkin pie and flipped it over. The shoppers in line behind me gasped. I was like "Seriously? You really just Seriously flipped my pie?"  So then I was thinking...OMG I have this beautiful pumpkin pie sign and no beautiful pumpkin pie.  So running to another store...I got this pumpkin pie...that is half the size of the first pumpkin pie, twice the money and didn't come decorated. So I had to figure out how to put the whipped cream on the pie!  How did I do?

Let me know and leave some love.  And get ready for that Thanksgiving Buffet!!  And you know where to get some beautiful images for your Buffet Table Signs....here at Scrapper's Delights

Cheers
Laurie

Monday, October 22, 2012

It's a Sketch Challenge!


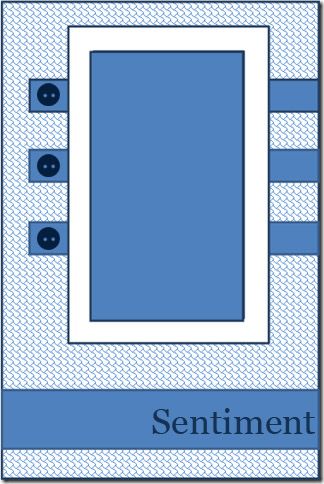
Hey everyone, lets play!  Using the sketch Below let's see what you can come up with. I love Halloween so October is a favorite month of mine to create.  I also love the spooky stuff. So in honor of that I went and made this cute little card using The Scrapper's Delights Grim Reaper digi.


I used Copic Markers to color in our little frightening friend. For his robe and scythe blade I used C3, C5, C7 and C9 from the Cool Grey Family. I used E07,E11,E23,and E31 from the Earth Tone Family for the scythe handle, and YR31 for his gloves.  The base, stripe and strips of card stock are from Carta Bella's All Hallow's Eve paper pack. The letter stamps are Harold's Letters from Lawn Fawn stamped in Memento's Tuxedo Black ink. The brads are from Stampin' Up.

And then I got a case of the sillies and my daughters and I decided that our Little Grim Reaper looked way to serious so we added googly eyes to him. Which then produced many giggles.

So now its your turn.....Show us what you can do with that sketch, it can be a card, a page, or a whatever you come up with. Head on over to the Scrapper's Delights Challenge Blog and check out the rules and then link your creation up there!
Cheers,

Wednesday, October 17, 2012

Operation Write Home's Midweek Throw Down Color Challenge

Hi everyone:

Here is my submission to the Operation Write Home 
Midweek Throwdown Color Challenge
It’s time for a color challenge and Doodle Pantry’s design team chose red & black with a pop of red or green!  We’re challenging you to make cards using black & white with a pop of red or greenfor our heroes to send home to their family and friends!  I really need to invest in a new camera or better lighting but as you can see the Lawn Fawn Reindeer has a bright red nose. The sentiment is from Stampin' Up. There is a bright red ball on the black and white gingham ribbon. I hope you like him! I made five of them to add to my box of cards to be shipped out to Operation Write Home.  Remember have fun, 
give our heroes your best...and NO GLITTER!
Cheers
Laurie

Tuesday, October 16, 2012

Lawnscaping Challenge

Hi everyone I love Lawn Fawn stamps and when I actually had time to partake of one of the Lawnscaping challenges...I got so excited! This challenge is to try a technique you have never tried
before.

When we moved into our new house 3 years ago I found a box of quilling supplies that I bought and thought...some day I have got to try this. Onto a shelf the whole box of supplies went, never to see the light of day until I saw this challenge.
So here is my attempt at quilling some snowflakes!

So this is what I came up with the cute little owl and the sentiment is of course Lawn Fawn. The coloring medium are Copic Markers.  The snow is glitter pen, stickles and quilling papers!

I hope this card inspires you!  And check out the Lawnscaping Challenge Blog
Cheers
Laurie

Wednesday, October 10, 2012


Halloween Treat Bags

Hey everyone!  I know we all love to use our digital stamps on cards and scrapbook pages to celebrate the holidays. I was thinking about that this week. I love this little witch, her name is Sabrina the Witch from Scrapper's Delights. I wanted to showcase her but I wasn't sure if I wanted to make a card. Neither one of my girls are going to dress up for Halloween this year, I guess 11 and 9 is now to old for such tomfoolery. <grin>  So what could I do with this digital stamp?  Well take a look at what I did!


I made candy bags for my girls classes. Yes, you can run a paper bag through your printer. All you need to do is reset the paper size to the size of your paper bag. I reset mine to 9" height and 5.5" in width.  Once that was set and I had our little witch placed on the page, I added the text underneath, the font is called Chiller.  I then taped the top of the bag closed and the flap from the bottom down. I then ran it though my printer! Yes! It was that easy.  Once she was all printed out, I colored her in with water based markers. Then filled the bag up with Halloween Treats, punched in two hole and tied with a ribbon. It was so easy and I just love the way it came out.  Such and easy afternoon  project and easy to make in bulk.  So there you go....just one more use for digital stamps. What are you going to try printing them out on?  And if you need more inspiration check out the other designers work at Scrapper's Delights Paper Craft Blog!

Let me know and leave a comment.
Thanks
Laurie

Friday, October 5, 2012

I Got Two Things Last Weekend


Intermediate Copic CertificationStandard Copic CertificationHey everyone. I got two things last weekend. Can you guess what they are?  And after taking a month off from the Scrapper's Delights design team, I am so happy to be back and at it again. So stay tuned...we have some really great stuff coming up. I am hosting a sketch challenge over there on the 21st! So check it out as well as the other team     members challenges. You know what to do...click on the following link.  http://scrappersdelightspapercrafts.blogspot.com/

Wednesday, September 5, 2012

Operation Write Home Meets Lawn Fawn...

Hey everyone! Check out this card I made for Operation Write Home using the Flying By set from Lawn Fawn.

This is what I used.
1 A2 card base in kraft.
alternating strips of colored card stock in the rainbow colors. The red, yellow and blue strips are 1/2" thick and the orange, green and violet strips are 1/4" thick.  The length of the strips will depend on where you stamp the planes contrail.
I also used a raised dotted Swiss card stock to create the clouds. I just punched out two using my cloud punch. Flip the paper over after the first one is punched so that your second cloud will be a mirrored image of the first one. I inked the edges of the clouds to give them some dimension and color.
I stamped the contrail and sentiment onto the card stock base with Memento Tuxedo Black ink.
Then I stamped the paper airplane onto Lawn Fawn paper from their Bright Side Collection paper pack and cut it out.
I used a good quality tape runner to adhere the rainbow strips onto the card. Glued on the far right cloud and then popped the second cloud up using pop dots. I then added the airplane to the popped cloud, and a gemstone to the other cloud.

On retrospect I think next time I will try to make it look like the airplane is weaving in and out of the rainbow stripes.

All and all I think it came out super cute and it would be a great card for one of our Heroes to send home to their child. Also you can get an Operation Write Home stamp for the back of your cards on their website.

So check out Operation Write Home and Lawn Fawn!

And as always you know what to do.....leave a comment!

Have a great day.
Laurie

Friday, August 24, 2012

Lucy on a Card with Flowers


Ok the titles kind of dorky but I couldn't resist. This little angel's name is Lucy and you can get her here at Scrapper's Delights.  The card is an A2, which means its 4 1/4 inches by 5 1/2 inches. I needed to print out Lucy quite small to fit onto the card and I thought that would make her difficult to color. The first run through with my copic markers didn't work so well, but freshly sharpened colored pencils and Gamsol for blending worked just beautifully. I was able to match her dress with the center of the large chipboard flower that dominates the card.  I chose to make her a blonde because I wanted her to POP! This was to make sure that even though she isn't the largest element on the card she is the focal point.  I hope you give this a try.  Grab an A2 card, some large chip board elements, patterned paper and Lucy and see how much fun it is to make her PoP!
Have a great weekend and don't forget to check out the challenge blog! Janice has some birthday fun coming up!
Cheers
Laurie

Thursday, July 19, 2012

What do you do when its too hot to go outside?


Hey Peeps!  Its summer time over here in Sunny California.  During the summer when it too hot to go outside (108 degrees), I like to find the coolest place in the house and just play with my crafting supplies.  This week I decided to dig out my colored pencils. I like using these on intricate images because I can keep them very sharp.  I used this border from the Scrappers Delights Borders and Corners  set. If you haven't checked out this set, you're missing out, Janice has created a very versatile and oh so useful.  This set is going into my Go To file!

As you can see on this 5 1/4" by 6" image the vines and leaves are very delicate and in many places just ohhh sooo tiny. Using a colored pencil allows you to keep the lead super sharp so you can get into those tiny spots and have the details shine through.  I then colored in the hearts with a glitter pen.  The sentiment was from my standard issue MS Word program (no fancy fonts there) and I used my new glitter tape on the bottom.  The card base was a 6 1/4" by 10 3/4" folded in half. Don't forget to score the fold so that it looks crisp.  Also I made a cute little bow with the washi tape by cutting a 2 1/2 " piece and folding them so that the ends meet in the middle. I then placed with is on the border and added a gem stone to finish the bow off.

Please feel free to comments or ask questions about any of the techniques I have used. And as always I can be reached through my blog at www.lauriescraftingblog.blogspot.com

Cheers
Laurie

Saturday, June 30, 2012

The 4th of July and Operation Write Home

Hi everyone,
With the 4th of July right around the corner, it makes me thing of the men and women who protect our freedom. I was one the Operation Write Home  blog this morning and I decided to challenge myself. I am going to do 25 cards from now until the 11:59 on July 4th. These I will send out to Operation Write Home before the end of the week.  Do you care to join me on this challenge?
Let me know.....leave a comment and I will keep you all updated on my progress! Please check out Laurel's Blog for more information and guidelines.

Cheers and Happy 4th!
May God Bless the USA!
Laurie

Monday, June 25, 2012

Guitars for Guys and Girls


Hi Everyone! I hope you are all having a great summer. Mine has yet to actually start. LOL  Been living in the car or backstage this month.  Siena has three days of showcase this week and Ani has paper crafts and soccer camp this week as well. Its a pretty light week compared to last week. Hopefully I will get to experiment with my new copics?  
So here is my creation for this week. This cute guitar is from Scrappers Delights! This is our Guitar digital stamp and while the traditional colors are black and grey....well I have girls so, Siena picked out the hot pink and Ani picked out the neon green. I added the purple because Prince's Purple Rain was on the radio!  Isn't fun how colors come together? I just did a simple card to have on hand for those birthday parties that spring up out of no where. You know the ones...at 11pm the night before... "Mom don't forget I need a present for "so and so's" birthday party tomorrow morning. This guitar is perfect to have in your arsenal of digital stamps. It can be used for girly and all boy cards. I printed the quote right on the Copic Card Stock in neon green and then outlined it with my hot pink marker. I added neon green bracket stickers and whaaaa laaaah! Now remember if you want this super cute guitar click the link here. And for only a dollar its a great staple to have in your collection!
Cheers and See You Next Month
Laurie
www.lauriescraftingblog.blogspot.com

Thursday, May 31, 2012

Messy Coloring?


Hey everyone! I was playing around with the Roses and Butterflies digital stamps from Scrappers Delights and I decorated this cigar box for my daughter. She needed something to put her dance competition pins in, and this box was the perfect size. I printed out multiple copies of  the roses and the butterflies and then colored them in with my Copic Markers. I tried to make a video explaining "Messy Coloring". Its my first video so please be gentle. = ) Here is the link.


I left the inside as it was because I know my 11 year old will trash it, but I did cover the outside with this pretty distressed paper.  Once the paper was decoupaged into place and dried. I cut out all the roses and butterflies.  I decoupaged these onto the top and front of the box. I then added the little bow. Now she has a     decent sized box for her current and future pins.

Please Leave A Comment!
Cheers
Laurie


Saturday, May 26, 2012

Gotta Luv Those Goth Girlz

Hey Everyone!  Are you all ready for Summer break? I know I am!  As you know we are having a Goth contest here at Scrapper's Delights.  This is what I came up with.  I really like the clean and simple approach to cards and scrap booking. That being said I have found that some themes such as vintage to be a really difficult look to achieve within the Clean and Simple (CAS) aesthetic. So when I began working with our Little Goth Girl, I almost went into panic mode.  But guess what? She fit into that style perfectly.  So I could go outside my comfort zone but still stay within it.  Take a look at what I did with her and I will point out how I kept within the CAS look but still kept this card nicely "GOTH".

The first rule of CAS design is to use no more than 3 embellishments. As you can see I have three on this card, the ribbon, the gemstone and the black bead runner between the text. I also used only two colors, the purple and teal, and two neutrals..the black and white.  Except for the scalloped circle on which our little girl is showcased, all other lines are straight rectangles.  To keep the sentiment simple and within our theme I found this really cool font called "chiller" online and I was able to download it for free. I printed it out on white card stock, matted it onto the purple card stock, added the beading and my Goth Card was finished and it is both GOTH and CAS. 
Here are the rules for Clean and Simple Design
1. No more than three embellishments.
2. No more than two colors (Hair color does not count)
3) No more than two Neutrals (these are black, white, cream, beige, taupe  and so on)
4) No more than two edge types...on this card we have mainly straight lines and one item has a round scalloped edge.
5) No more than two patterned papers.  On this project I chose not to use any.

Keep to those simple guidelines and your projects will be perfectly balanced and Clean and Simple.

Ya'all have a great weekend!
Laurie


Friday, May 18, 2012


  Can you believe there is only 13 days left of school? If you're like me you volunteer quite a bit in your kid's school. I have five classes of kids that I work with and I like to make my last day with them special.  This year I decided (mainly because my schedule is insane busy) to give the kids candy bars.  Draco was perfect for this because the boys will like it too. You can get Drago here.  So I put Draco and this cute quote about dragons onto card stock. I cut straight across the bottom and top of the quote but stopping when I got to Draco. I then fussy cutted the top and bottom of Draco so that he would pop up out of the wrapper. I used Copic's to color him in.  This is a fast and easy way to make a cute candy bar wrappers. Since I have 129 of these to make, I better get going. You all have a wonderful weekend and keep crafting. And if you're looking for a great digital stamp to work with head on over to the Scrapper's Delights Store and if you need inspiration head on over to the Scrapper's Delights Paper Craft Blog!

Please leave a comment!  We love them!
Cheers
Laurie

Thursday, May 10, 2012

Rain Coats and Rain Drops!

Wow, its good to be off of bed rest and back to blogging! I was playing around with my MS Word program and this little gem. She is from the Rainy Day collection and you can get her here!  I was trying to make different sizes and accidentally flipped her over. My first thought was "twins" So that is exactly what I did. I placed one of the digis on the page and then copied and pasted her again. This time I flipped her and lined them up so that they looked like their fingers were touching. So sweet! Now here is the neat trick. I wanted them to have patterned raincoats, hats, boots and umbrellas.  So I printed them out as they were, then I placed pieces of patterned paper where I wanted them. These I secured with a strong re-positional tape and ran it though the printer a second time. Now I have my girls printed out on the patterned paper. After fussy cutting out their outfits, gluing them down on the original print out, I then colored the rest of them in with my Copic Markers.  I stamped on the cloud and splashes and then colored in the puddles with Stickles. Then I added in some gemstone rain drops, and finished this card up with a little stamped sentiment!  This was a new technique for me and I hope you have as much fun trying it out as I did when I accidentally stumbled onto it. Now I am working on figuring out how to layer digital stamps. If you know how please leave a comment! 

Have a Terrific Tuesday!
Laurie

Sunday, May 6, 2012

New Scrapper's Delights Challenge


Click HERE to participate in our NEW Challenge !
MAY FLOWERS (May 06 - May 19)
To qualify for this challenge you need to have flowers on your creation, this can be as an image,digi or an embellishment and has to be visible!
This month there will be one winner and they will receive 6 (single) digi stamps of their choice!
You do not have to include a product made by Scrapper's Delights.
But you only have one chance at winning with your entry.

Here is how you can get up to 2X the chance of winning with each entry:

*1st chance
Everyone that submits a project is valid as long as they base it round the general theme for the challenge.

*2nd Chance
Include a product made by me in your creation be it a paid or freebie.

*if you have qualified for a second chance in winning you will need to submit your entry twice so the random.Org will generate the correct chances for you XXX

Please click here to check out the super cute digi stamps that Janice has made for us!


Also check out what the design team has come up with for you this month!


Have fun and Cheers,
Laurie

Friday, April 20, 2012

Hi everyone, I was supposed to post this yesterday but I had some bandwidth issues. So here we are a day late but not a card short.  Now this darling little pixie is from Scrapper's Delights. and she is so much fun to color! Being from New Hampshire the minute I saw those wings I thought Monarch Butterfly! So that is what I did with her! I also thought she would look super cute in sage green and cream colored clothing. I used patterned paper from Lawn Fawn to create the field that she is sitting on. I simply tore it and then inked the edges with a dark green ink.  I then fussy cut out our little pixie and pop dotted her onto the card. then I added the clouds, the sentiment (I need to expand my collection of these) and the flowers and pixie dust. then I hand drew in the stems and leaves.  The card opens from the bottom and is a 6" by 6" card!  Now head on over to Scrapper's Delights and check out the full array of pixies and other fun stuff!

Have a Phenomenal Weekend!

Laurie

Monday, April 16, 2012

Helmar Design Team Call

Helmar Design Team Call 2012


  Helmarlogo
     
   Helmar Design Team Call 2012
Helmar is a recognized leader of adhesives and aerosols in the Arts and Crafts industry and we are looking for new design team members to promote our amazing products. If you’d like to be a part of one of the most creative and easy going design teams out there, while showcasing Helmar products and your talent, this call is for you!!!
We are looking for dedicated design team members that work well with deadlines, direction and preferred partner products. As a Helmar design team member, you will serve a 6 month term beginning May 1, 2012.
As a part of the Helmar Design Team you will…
  • Receive a surplus amount of Helmar products and advance releases of new Helmar Products as well
  • Endorsement fees for published layouts and tradeshow projects
  • Amazing products from our generous Preferred Partners throughout your term
Now what does it take to be a part of the Helmar Team? Here are your responsibilities
  • 3 projects per month consisting of (but not including all every month) blog posts on the Helmar blog and your personal blog, video tutorials, blog hop projects, Preferred Partner projects and Helmar challenge projects. These are on a rotating calendar basis that will be provided to you. Edited to add- Video tutorials are not a requirement. If you would rather do a Step out photo tutorial, we'd love that too!!!
  • Keeping your personal blog up to date and linking Helmar at every opportunity. Using Preferred Partners product is also appreciated.
  • Facebook, Twitter, Ustream and YouTube involvement. Social Media is big in the industry and we want you to be a part of it!!!
  • Monthly submissions to magazines and publications
  • Special projects as per requested for shows, catalogs, promotional items and trade shows
 If you are interested in being a part of a fantastic team, please send the following information in a single email
1)      Name, address, daytime/evening phone number and email address.
2)      Short biography
3)      Links to any online galleries, blogs, facebook, twitter pages and video streams ( youtube, ustream, vimeo)
4)      List or attached resume of other design teams you are or have previously been on.
5)      A brief paragraph letting us know why you would like to be a part of the Helmar Design Team
6)      3-5 examples of your work that will best showcase what you will bring to the Helmar table. (Layouts, cards, altered art, mixed media, sewing projects, crafts etc.) Make sure to list any special techniques you’ve used using adhesives. Please no photos bigger than 500kb each.
7)      Anything else you feel we need to know about you
Please submit your application to erikataylor@helmar.com.au by April 18th, 2012 with "Helmar Design Team Application" as the subject. No late submissions will be accepted. The new Helmar Design Team will be announced by the 30th of April, 2012
Notes:
At this time we are only accepting applications from Australia, Canada and United States.
Helmar Adhesives do not need to be used on your submission samples but are appreciated.

Thursday, April 12, 2012

A Honey of a Digital Stamp

One of my design team projects for the Scrapper's Delights Blog, was this darling little Bee!
Now on this card I used both acrylic stamps and digital stamps. So I noticed a few things in my little experiment. I did a much better job of stamping when I had my rubber mat, or my stamping tool. Using a clear block was kind of a hassle due to the fact that I could not get even pressure.  Now look at the Digital stamp. Our little friend the Bee. Not only did the black come out crisp, clean and complete. I was able to print her out on glossy card stock and pack her up with my Copics and Gel Pens and work on her while away from home.  So this cutie pie went with me to Yosemite State Park!  Now you don't need to have a lot of expensive embellishments with this card. It's a CAS card or a Clean and Simple card.  I stamped the background with a chevron stamp in black.  You can clearly see where the ink did not transfer quite as well as I would like (this is due to a pressure issue). I then layered a 6" by 3" strip of yellow cards stock with a 6" by 2 1/2" piece of black card stock and then a 6" by 2" piece of white card stock. This I centered onto the card with exactly 1 1/2"  of space on either side.  Now check out the white strip on the left side of the card, along the right side of the white strip the card has been scored and then burnished. This is so the card will be stable when stood up.  I printed out a quote and then matted that as well. The border around the quote is 1/4".  
Now on our little Bee. I used my Copic markers to color in her yellow spaces. On the black spaces I very carefully with a tiny paint brush, bushed on a gel glaze.  I used Spica glitter pens on the honey pot and the honey.  I popped up the honey pot with a zap dot. I used a combination of teal marker and glaze gel to create her beautiful blue eyes.  Her eye shadow is an ultra fine blue glitter mixed with gel glaze.  Her wings were colored in first with a combination of baby blue, pale green and a soft yellow. Over this I brushed on a mixture of an ultra find iridescent glitter and gel glaze.  I love how the wings are both sparkly and translucent, just as wings should be!  I then used an off set matting technique that I had learned in a class years ago but haven't used since.  I thought it worked really well on this card. I also liked that the only other color besides yellow was on our graphic, making our little friend POP!
So the next time you travel, need to pack light and want to bring some crafting projects with you. Digital Stamps are the Way to Go!
Now you want to click on this link and grab this little cutie with some fun extras while she is still on sale!
Have a Great Weekend.
Laurie

Friday, March 30, 2012

Has Spring Spung?

Hi everyone, and Happy Spring! 


 I hope you all enjoyed our first ever blog hop!  We had so much fun. Now check out this little cutie pie from Scrapper's Delights! I was inspired by the purple and yellow flowers that are growing in my back yard.  I enlarged her and used just the upper part of the stamp because I really wanted to focus on her pixie-ish face.  For some reason I had to do her eyes in teal.  There is a check out girl at our old grocery store and she had the most amazing teal eyes.  Her hair....now check out that head of hair. I had such a blast coloring in her hair with my copic markers. I went for a brown with red highlights.  I love the versatility of these digital stamps. You can change the size, flip them over, and even enlarge just one area such as I did here.  I am looking forward to seeing you all on our next digital stamp adventure!  Janice you out did yourself with this little cutie pie! And she is on sale! Go Check her out and all the other really cool digital stamps from Scrappers Delights.

Thursday, March 29, 2012

Blog Hop WINNERS!!

Woohoo!  Our first blog hop was a great starting point for many hops to come.  THANK YOU to everyone who participated, Janice, Create with TLC (our sponsor) and to our awesome DTs.  They rock!!  As promised, below are the winners of the blog hop.  We truly appreciate your participation and hope to see you again!

The secret DTs blog winners who won an image are...

Mary J  http://maryjdesigns.blogspot.co.UK/ on Ria's blog.
Sandy http://simplysandy-sandy.blogspot.com/ on Chrizette's blog.
Torrey  http://left-field-studio.blogspot.com/ from Laurie's blog.
Dorinda http://rinchak.blogspot.com/ from Jodi's blog.

The Grand Prize goes to...

*Courtney who will win an image Scrapper's Delights Store and a wordart set from Create with TLC.

Please email Janice (sdelights@tiscali.co.uk) to claim your image.

Again, thank you so much for your participation and be on the look out for our next hop.  


*Candy will email you your wordart set.  


P.S. Don't forget our Easter Challenge is up and running so color up an image and enter here.

Friday, March 23, 2012

Scrapper's Delights Blog Hop

  • "Hi you have arrived at Laurie's blog. You should have arrived here from Chrizette's awesome blog. 

If you get lost along the way, start at the beginning here Scrapper's Delights Paper Crafting Blog. Use the inlinkz button to add your information for a chance to win the grand prize.

Thanks for stopping by. Don't forget to comment at each blog for a chance to win some fun prizes. The talented Judith is up next on the hop. Have fun!"  If Judith's blog isn't updated yet, please check back as we are all over the world and in different time zones!


Now let's take a look at the project I did for this fun blog hop! 


S'Mores in a Jar
Yes that is right... S'mores in a jar!
What could be better? Combining the flavors of the familiar campfire treat with the seasonal sweetness of Peeps ® brand marshmallow candies.  And the cool thing is...you can change the theme for each holiday.  So cool!  These make great gifts for teachers, too!

So let's check out our Easter S'mores in a Jar!

You will need one  1 canning jar, quart-size with lid and ring.

Then layer the ingredients below:

1 sleeve graham crackers (about 10 crackers or 1 1/2 cups of crushed crackers)
1 large package seasonal peeps ® brand marshmallow candies
1/3cupbrown sugar, packed
1/4cupchocolate chips or seasonal m&ms brand milk chocolate candies.


Once you have your mason jar stuffed with yummy goodness, put the lid and ring on securely. Decorate as you wish. I used a paper ruffle, and a sticker border.


Then it's time to create your own gift tag with this S'Mores In A Jar Recipe: Here's Mine!
S'Mores In A Jar Recipe
Empty jar into large bowl. Remove marshmallows and combine remaining ingredients, mixing well.
Snip marshmallows into small pieces with scissors. Return to bowl; stir into dry mix.
Melt 1/2 cup butter, and add melted butter, 1 teaspoon vanilla extract and 1/3rd cup buttermilk to bowl. Mix well.
Press lightly into greased 9-by-9 inch pan. Bake at 350 degrees for 15 minutes.
Then the really fun part....decorating the front of your tag.  Here's what I did with mine!
I printed out our little angel onto Bazzill smooth white card stock. You can get her here. She is from Scrapper"s Delights, the host of our great blog hop. Then I colored her in with my Copic Markers. I finally got to use my neon colors! The green pleated paper is "perfectly Pleated" from Bazzill Basics, the flower stickers and border stickers are TPC Studio's Sunny Bunny Sticker Sheet. I used a dark pink brad and orange and green twine to tie the tag onto the jar lid.  

Here is a close up of our little bunny girl. I gave her blond hair and blue eyes. I used pink, orange and green as my color theme.


Now let's take a look at the finished project!  I am going to give this to a friend for Easter.

Don't forget to leave a comment and head on over to the next blog.
Good luck winning a great prize!
Laurie

Tuesday, March 20, 2012

Irish Everyday!


Hi everyone! well St. Paddy's day has come and gone but like a lot of us I still and and continue to be Irish.  So when Janice created this little pixie, I had to have her. You can get her here. I knew what I was going to do with her almost immediately. I didn't need anymore St. Patrick's Day decorations but I did need some all -year-around Irish decor items.  So I made this wall hanging. The quote says "May your blessings outnumber the shamrocks that grow".  I used my ever trusty heart shaped punch to make the shamrock that is on the side.  I used my copic markers (I so need more green ones) and colored pencils to color in our little lass.  I love the way her face came out, especially her eyes.
I colored in her eyes with a green copic and then went over them with a gold glitter pen. I love the effect.  I did do her lips in a light green and then added glaze on top of it.  I am not thrilled with the way her lips turned out, but that is the beauty of digital stamps.  I can printer her out again and color her to perfection.

Looking forward to showing you what I come up with next! And don't forget to check out the amazing stuff created by the Scrappers Delight's Design Team, just click the link.

Cheers,
Laurie

Monday, March 12, 2012

I have been awarded! The Versatile Blogger Award!

I have been nominated for the versatile blogger award by the very talented Mama Smurf.  Thank You sooo much!  This totally put a grin on my face!

There a couple of conditions attached to this award:-


"If you are nominated, you have been awarded the Versatile Blogger award". First, thank the person who gave you this award.http://mamma-smurf.blogspot.com/
  • Include a link to their blog,
  • Select 15 blogs that you have either recently discovered or follow regularly,
  • Nominate those 15 bloggers for the Versatile Blogger Award,
  • Finally, tell the person who nominated you 7 things about yourself.

My Nominees for The Versatile Blogger Award (In no particular order)Are:


Well done everyone.

Now 7 things about myself.
  1. I have 2 daughters age 11 and 8
  2. I have been together with my husband for almost 20 years.
  3. I volunteer at my girls elementary school quite a lot and I am co-writing an art enrichment program exclusively for our school.
  4. I have been crafting for 15 years and I am totally addicted to all things crafty! I lovestamps, digi stamps, acrylic stamps, wooden stamps...postage stamps (just kidding on the last one)
  5. I like to listen to Eminem when I craft.....contradiction of terms...I know!
  6. Give me Copics or Give me Death!
  7. I have a very spoiled Yorkie named Boo.
Thanks again for the award and well done to those i have nominated, get your award and show it off on your blog.

Cheers,
Laurie